Next up was to degrease and paint the floors inside the cockpit in prep for insulation and new carpets. No real technique here- just clean and paint. I used a paint product which is basically an indestructible rust barrier once it dries. If some future owner ever needs to strip it off, they will cursing my name.
 |
| degreased and ready for paint |
 |
| getting started |
 |
| you must wear gloves with this stuff- I know first hand that it takes about a week for it to wear off of a forearm |
 |
| good enough, and ready for insulation |
While I worked on the floor, Drew removed the rear lenses for replacement. While he had it all apart, he checked the bulbs, cleaned the connections, and cleaned behind the lenses as much as possible. After a quick run to NAPA for some new bulbs, he put it all back together. Looks really good.
 |
| drivers side taillight and reverse light |
 |
| looking pretty good |
I also replaced the differential oil. No real trouble, aside from having to grind down a 1/2" drive adapter to fit the square hole drain and fill plugs on the differential.
 |
| draining out the old oil- was pretty dirty |
 |
| fill hole |
 |
| filling up with 80-90 hypoid gear oil |
Next, I installed the sound/heat shield I bought at Lowe's. I didn't want to spend the money for specific auto insulation, so I bought this stuff. I have read that others have used it on their cars, so I figured it couldn't hurt. It cut to fit, lightly glued down, and then taped with aluminum duct tape.
 |
| floor insulation installed |
 |
| Finished. You can see the holes cut out for seat belt mounts and seat rail mounting |
|
|
I also replaced the throttle cable since it was quite frayed and seemed a little stiff and I certainly don't want it to stick open on my inevitable first drive!
 |
| I wonder if this really needed replacement?? |
 |
| new cable ready for installation |
|
I replaced the vinyl on the driver's side door cap. It was torn and completely ruined. I bought some black marine vinyl and cut it to match the old cover. Then, I stapled it to the foam/wood backing supports. Looks o.k.- not great, but good enough for now.
 |
| new driver's side cover is the top one, the bottom one is the original passenger side door top and was in decent shape- I just painted it with vinyl paint. I doubt anyone will ever notice the different pattern |
 |
| closer shot |
 |
| chrome finishing trim |
 |
| installed- the flash makes it look worse than it is |
The next weekend started with installing a new clutch master cylinder. It's the job for a contortionist since access to the mounting bolts and hydraulic line are from through a small hole under the dash. I tapped threads in the new master cylinder so it installs with just two bolts instead of bolts and nuts which made mounting it to the pedal box easier.
 |
| tapping in 3/8" fine threads |
Most of the remaining weekend was spent installing the new carpets. It's basically just a huge puzzle since my car didn't have all of the carpets when I bought it. I just dry fit all of the pieces, trimmed them to fit, and glued them down. It really transformed how the car looks- instant gratification! I'll just post a few photos which will show the progress:
 |
| o.k., so what goes where? |
 |
| the sill carpets went in first |
 |
| then the footwell pieces went in |
 |
| passenger footwell |
 |
| new door seals installed after the sill carpet |
 |
| test fit of the floor carpets to make sure everything was in the right place |
 |
| looking great! |
 |
| rear shelf carpets going in- the tunnel piece is not glued in yet |
 |
| pretty much finished- I'll finish the floor mats while installing the seats |
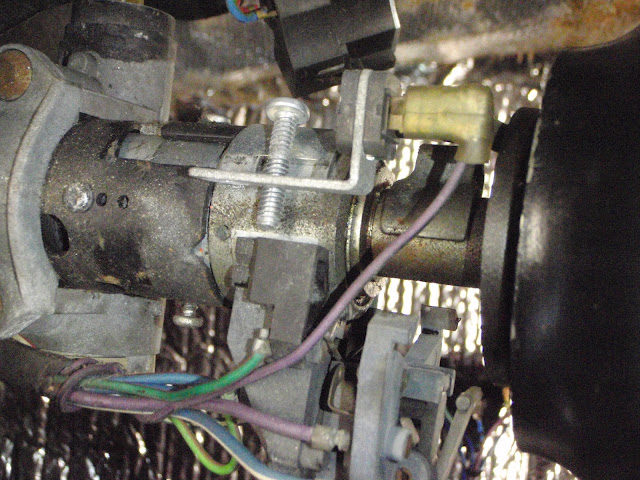
The turn signal switch on the steering column was broken so it would not hold in the up or down position nor would it self-cancel. I bought a new one and installed it with no problems- just a little fiddly to get everything lined up correctly so it would work.
 |
| close-up of the old one coming off |
 |
| horn brush spring after polishing and dielectric grease- this rides on a ring behind the steering wheel so there is an electrical connection from the horn wherever the steering wheel is positioned |
 |
| new unit going in- the old one is on the floor |
 |
| finished with cowling reinstalled |
I installed all but one of the wheels to see how they look on the car. Basically, I wanted to get them out of the way more than anything else. I like it!
 |
| this is actually starting to look like a car again |
 |
| not quite ready to hop in for a drive, but she is getting there |
And finally just for fun, I put some elbow grease into seeing how this old paint might be saved (where there isn't primer and bondo...). I used some rubbing compound, then glaze, and finally wax on the drivers front fender. Looks pretty good, although I need to be careful since a little of the original primer is now showing through the paint!!
 |
| a little shine on some thin thin paint |
 |
| a closer shot |
So, next up we will try to bleed the new clutch master, and maybe install the seats.


