I made good progress on both cars this weekend- I'll start with the Miata:
Basically, I had to fit the passenger side panel first. I bought some panel clamps from Eastwood, and they were invaluable since I could quickly attach the panel to check the fit, remove it, trim, and try again. Once both panels were cut and bent pretty well into shape, I clamped them in and continued molding the metal with a hammer and chunk of angled steel.
 |
| Pre panel fit= the black stuff is POR-15 sealing paint for the structural steel below the thin panel I'm replacing |
 |
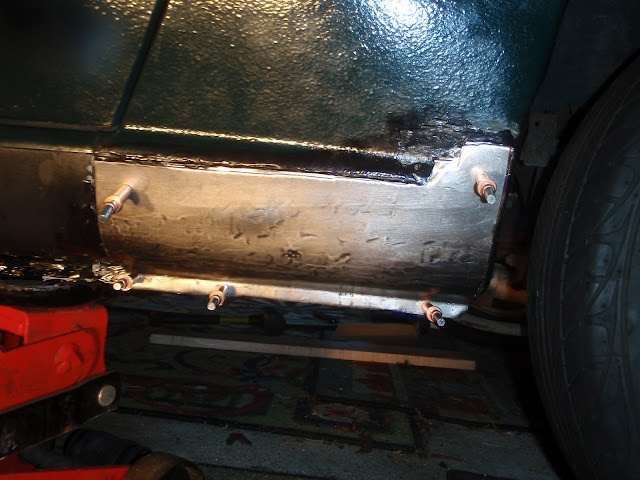
| First fit of the passenger side panel- needs a bit of trimming and bending. The copper colored pins are the panel clamps. |
 |
| Looking better- shaping the steel |
 |
| Ready for gluing- no welding for me! |
 |
| Drivers side getting started. |
 |
| Pretty much ready for seal sealer and body filler |
|
Once I was happy with the panel fit, everything got a good cleaning and sanding in prep for the panel adhesive. I decided to install the panels with rivets instead of using the removable clamps to hold it all together during the panel adhesive drying process. No problem gluing the panels- I bought the adhesive from Eastwood and it works fine by installing the two-part product with mixing nozzle in a standard caulking gun and just dispensing it out on the panels to be glued . The rivets held it all together (using the 1/8" holes already drilled for the panel clamps). Next, all of the bigger gaps and spaces got a good coating of seam sealer. It's basically just really thick POR-15. Once all of the gaps were filled, it was time to let it all dry overnight.
 |
| Riveted and seal sealed |
The next day was for body filler, sanding, and primer. Pretty basic work, although I have never really used body filler. I figured I could always sand out my mistakes! It went fine, although it was tough to try and keep everything warm in an unheated garage in Maine in February- lot's of lamps!
 |
| Very sloppy first coat of filler- thanks for sand paper later! |
 |
| Filler on the passenger side |
 |
| After final coat of filler and lots of sanding |
 |
| Driver side after masking and primer |
 |
| Passenger side after masking and primer- a few drips I'll sand out next weekend. |
On to the MG. Drew came over to help while I was still working on the Miata. He removed both seats so I had something to work on in the warm basement since I'm sure there will be weekends in the next couple of months that are too cold in the garage. The seats need a ton of work including getting the seat backs to fold forward (rust), getting them to slide easily (dirt, rust, etc), replacing the foams, painting the seat frames, and replacing the dried brittle vinyl covers.
 |
| Rusty and cruddy seat slider. The leaves came with the car... |
 |
| Seats out and garbage carpet removed. Floor pans look pretty good- just filthy. |
When I had some time waiting for things to dry on the Miata, I installed the carbs with the new gaskets. No real trouble here- I just looked at the old photos I took before removing them to make sure I had the linkages and throttle/choke cables installed correctly.
 |
| Cleaned up heat shield and new gaskets |
 |
| Installed heat sink spacers to keep the carbs as cool as possible since they are so close to the exhaust manifold underneath |
 |
| Carbs bolted on- no fuel and vent lines yet- maybe next weekend we'll try to fire her up again |
Also- Drew started to install the new flexible clutch hose from the hard line to the clutch slave cylinder installed on the side of the transmission. It's a tricky connection with very little room for hands and tools. He got the old one out by cutting it and using various sockets and wrenches.
No photos taken on this- ooops.
That's it for today- it's time for the Super Bowl.... Go Pats!!


Good job on the Miata.
ReplyDeleteLooks like you cleaned the s out of the heat shield, nice 1 chimichanga.
Thanks Ninja. Hopefully get the Miata inspected and then sold soon.
ReplyDelete