So, I ended up winning $90 at our annual cribbage tournament (no, I'm not 80) and took those winnings and bought a sandblast cabinet! The first use of it was to clean up the valve cover for paint. I also blasted the brake drums in prep for paint. 10 minutes in the blaster, and a little sanding/degreasing and the pieces were ready for paint. Some silver or black heat paint, and they were ready for install. It worked perfectly.
 |
| after blasting |
 |
| after blasting |
 |
| after some paint |
 |
| after some paint |
So, next up was to finish the rear brake install. No problems aside from noticing in the Haynes manual that the illustration of the handbrake pivot is wrong. If you install the pivot in the drum like it is shown, the handbrake will not work correctly....
 |
| new passenger side rear brakes complete |
 |
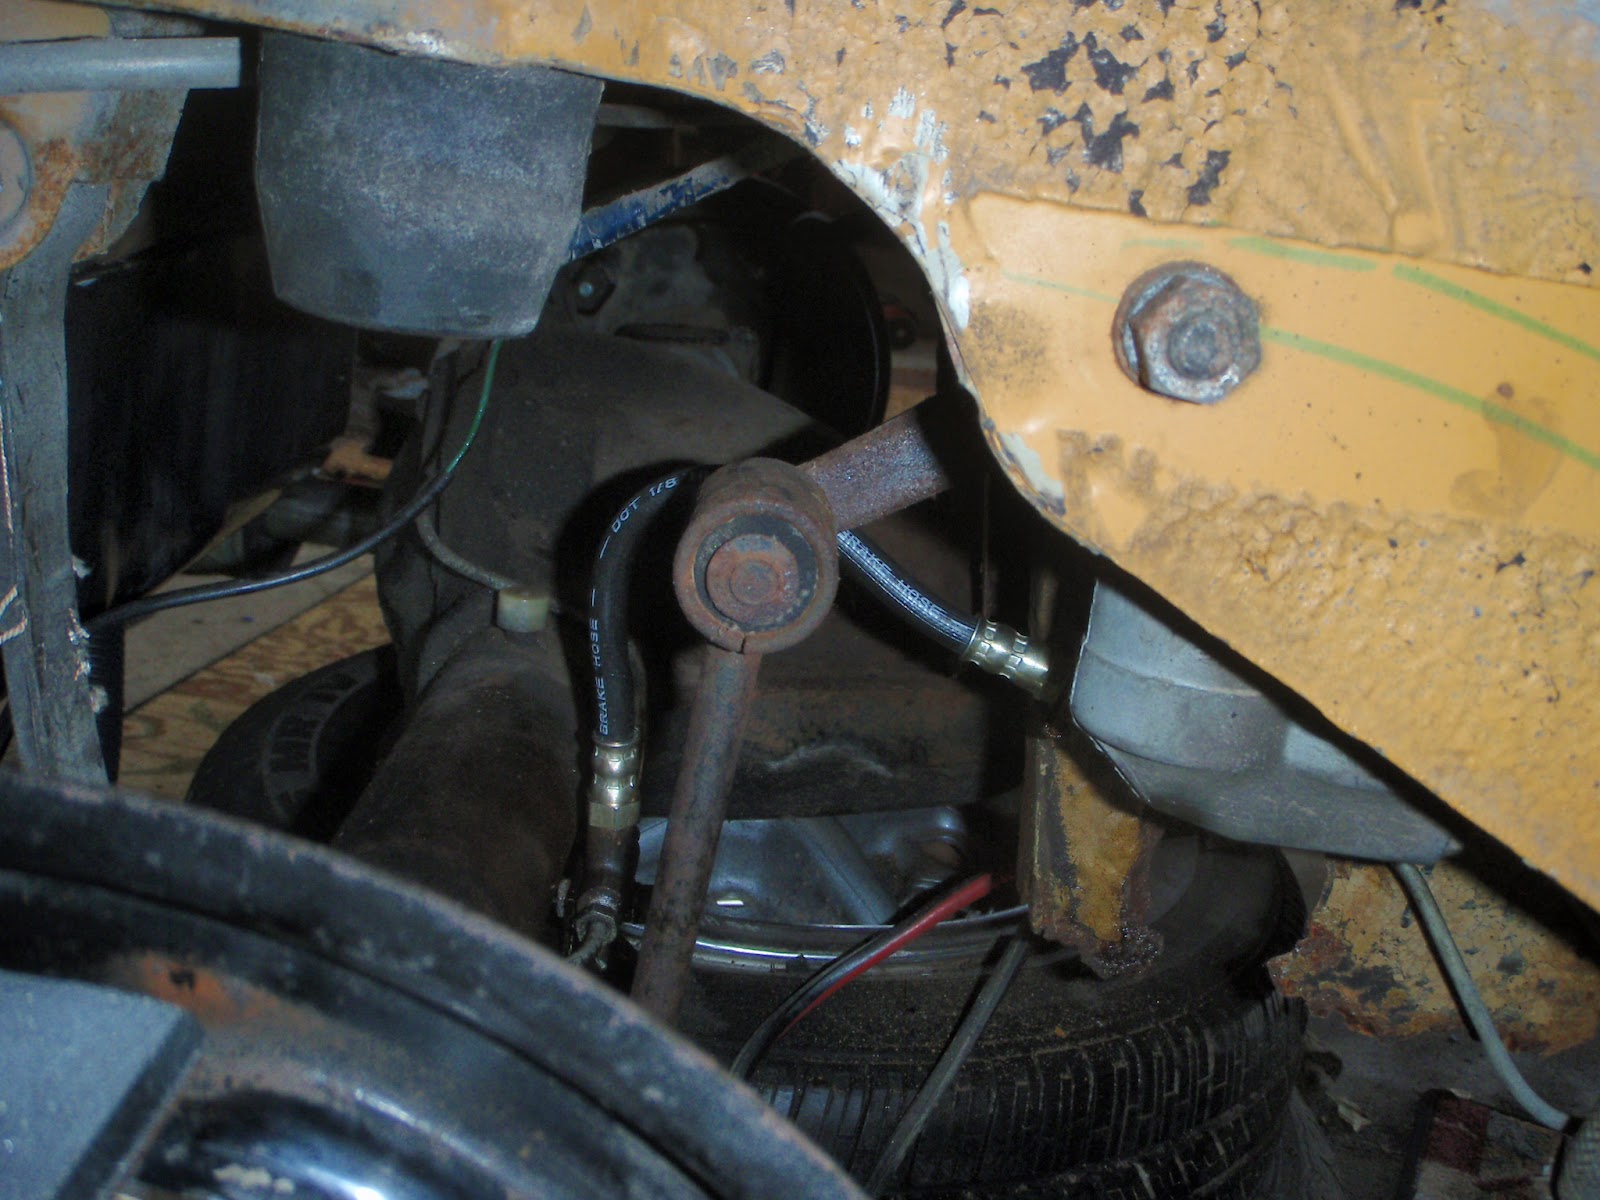
| new flexible brake line |
 |
| new flexible brake line |
After I removed the old flexible line (this is a single line system for the rear so there is only one flexible line for the back brakes- it splits into two hard lines when in attaches to the rear axle as shown), I decided to cut the old line to check the internal condition just for grins... and it was COMPLETELY clogged! No wonder the back brakes did not work at all. The internal rubber had just collapsed for lack of use.
 |
| no brake fluid getting through that |
 |
| another shot |
Next, I decided to remove as much of the aftermarket air conditioning system as possible, I removed the condenser, the air plenum under the dash above the passengers feet, the coolant lines, dash vents, fan,etc. About 40 pounds of useless crap. The only thing left is the compressor, which I will avoid for now since it lives under the alternator and looks like a big pain to get out.
 |
| old inop A/C system |
 |
| I can't belive they crammed this huge thing up under the dash- I have much more room to work under there now. |
Next, I adjusted the valves. No problems there, just a little time consuming since it was my first time on an MGB. I just followed the manual.
That was it for the day- quite busy.
The next day I had Drew's help again (awesome!) so we both jumped in with different jobs. I started removing the factory sound deadening/insulation from the cockpit floor, and he installed the new handbrake cable and repaired handbrake pull-handle.
The floor insulation was simply a grunt job with a hammer and small pry bar. It is a black tar-like substance that they laid between the raised strength ribs of the floor. I need to remove it because rust usually hides underneath it. It all came out, and of course, I found some rust. Not bad, but needing attention. I ended up with a bag full of the stuff after a few hours of pounding and prying. After it was gone, I used the wire brush on a drill to grind out the rust. I then degreased the entire floor in prep for the POR-15 later. The plan is to paint the floor with POR-15, then lay on some foil-backed insulation I bought from Lowe's for sound and heat. The new carpets will go on top of that.
 |
| quite a bagfull- maybe 20 pounds total |
 |
| ready for paint and new insulation |
Drew got to work installing the new handbrake parts. Basically just bolt up the new cable, install the handbrake lever, and give it a shot. I now have a functioning handbrake..... someday I hope to need it.
 |
| under car- new cable with adjuster- the pivot arm in the top left is connected to the bottom of the handbrake lever in the cockpit |
 |
| attached to the rear brake |
 |
| attachment at differential housing |
Next, Drew removed the front brake calipers, rotors, and hubs so I could take them inside and replace/rebuild with new lines, bearings, grease seals, etc. Upon later inspection of the calipers, I realized I needed to replace them as well- the pistons are rusty and the drivers side looked seized. It's not worth trying to rebuild them in this condition when entire rebuilt units are about $60/each. I disassembled both hubs, cleaned them of all of the old grease, and replaced the wheel bearings and bearing races. The old rotors will be replaced with new as well. The old bearings were the original to the car and didn't look bad at all once I cleaned them up. I already had both sets of new bearings, but decided to only replace on side as an experiment. It will be no big deal to replace a set later if the old original one fails- I doubt it will. I wouldn't be surprised if the new bearing fails before the old original one.
 |
| useless old caliper |
 |
| obviously, there was a grease seal problem here... |
 |
| no grease seal problem on the passenger side |
 |
| ready for rebuild/cleaning/etc. |
 |
| cleaned up hub |
 |
| new bearing race installed |
Here they are ready for install.
The stub axle on the MGB is a little different than the normal bearing arrangement than I am used to. Usually, the bearings are torqued down just enough so there is a little end float. But on these, the large cone shaped spacer in the photos is clamped between the two bearings and around the stub axle. The thin shims (look like thin washers) in the photos are used to adjust the distance between the cone spacer and the outer bearing. There are different thicknesses of shims, and you add or delete them (through trial and error) as needed so the the bearings still spin when the outer nut is torqued to about 60 ft/lbs, but still have between .002" and .004" of end float. I'll hook up my dial indicator to check this when I install the hubs later.
That is all for now- next week I should have the rebuilt distributor back. Hopefully I can get it installed and try running her again.


No comments:
Post a Comment
Note: Only a member of this blog may post a comment.